How to Clean Dirty Kitchen Floor Tiles

Nobody likes dirty kitchen floor tiles. You could be cooking the best meal of your life, but if you would have to tiptoe your way around grimy tiles, it really wouldn’t be topnotch. There are plenty of methods you can use to clean your floor tiles, according to LMS Cleaning Services, one of the best cleaners in Birmingham. Here are expert-tested ways to turn your dirty tiles so clean, you could eat off the kitchen floor.
Say No to Dirty Kitchen Floor Tiles
First things first—dirty kitchen floor tiles pose big health risks to you and your family, especially babies, little children and elderly. Look closely at your kitchen floor tiles; you see that gap between the tiles? That is grout, an adhesive substance that holds your kitchen floor tiles together.
Grout is porous and absorbs moisture; what this means is that it serves as a perfect breeding ground for mold, mildew and a plethora of bacteria such as Escherichia coli (E. coli), Staphylococcus aureus (Staph), Campylobacter jejuni (C. coli) and salmonella.
These nasty organisms can cause illnesses such as allergies, diarrhea, sore throat and asthma. What else could you expect if you fed a damp surface with food residues, dust, dirt and other particles?
How to Tell if Your Kitchen Floor Tiles are Dirty
Sometimes it’s not easy to tell whether your kitchen floor tiles are dirty or not unless they’re splattered with huge stains or are really soiled. What you have to do is look really closely, especially the spaces in between the tiles—or the grout.
If the gaps between the kitchen floor tiles are black and glistening, well we have news for you: the grout was not black when your kitchen tiles were installed—now, it’s time for a major cleanup.
How to Clean Dirty Kitchen Floor Tiles
Home improvement website Better Homes & Gardens recommends easy ways to clean kitchen floor tiles according to type:
1. Ceramic and Porcelain Floor Tiles
Ceramic and porcelain floor tiles are incredibly easy to clean as they are generally resistant to dirt: 1) Sweep or vacuum the floor to get rid of loose dirt and dust; 2) Mop the floor using clean water, detergent and a chamois-type mop to get rid of deep-seated dirt; 3) Scout the area for tile stains and use the appropriate stain remover, and 4) Let the floor dry by leaving the kitchen floor tiles undisturbed for about half an hour.
2. Slate Tile
Choose cleaners that are specifically designed for natural stone tiles as these work to protect these kinds of surfaces. Stay away from cleaning substances with acidic properties as these can damage the surface of the tiles.
3. Marble Tile
Marble tiles give an exquisite look to any home but they are not easy to maintain. As with slate tiles, acidic components could dull the shine of marble tiles so it is advised to check the pH level of your cleaning detergent. It is also important to use smooth rugs or mops and to stay away from implements with bristles or any pointed surface as these could scratch your gorgeous marble floor tiles.
4. Granite Tile
Granite also has a delicate surface that if you used an acidic cleaner, it could result in unsightly streaks or discoloration. You can go the extra mile by buffing your granite floor tiles to make them sparkling clean.
5. Vinyl Tile
Vinyl tiles are easy to clean and are made of resilient material, so they respond well to most types of cleaners, even highly acidic ones with lemon or vinegar. You have to be mindful about your scrubber though as this could scratch and damage the surface.
6. Linoleum Tile
Not to be confused with vinyl, linoleum tiles could be a little particular about their cleaning method. First, you clean the loose debris by sweeping or vacuuming, then you wash with a cleaning solution that is specifically made for linoleum flooring. This is vital to keeping the linoleum material in good shape.
After, you can proceed to rinsing and drying the linoleum floor.
How to Clean Grout
Now that you know how to clean your kitchen floor according to its tile type, it is time to put your attention to cleaning the grout between the tiles. Home solutions website Real Simple recommends these easy steps:
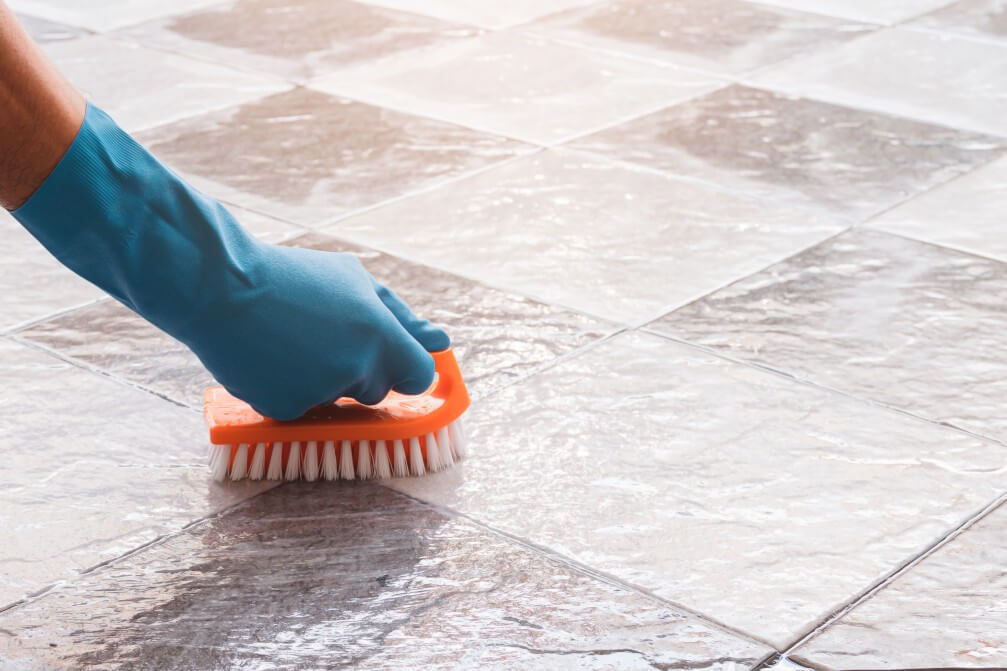
- With a stiff bristle brush and hot water, scrub the surface of the grout to get rid of dirt and grime. If you have a steam cleaner, you would save a lot of time and effort instead of scrubbing with your hands.
- Make cleaning paste with two household staple substances: baking soda and hydrogen peroxide. Mix two parts baking soda with one part hydrogen peroxide until it reaches a gooey consistency. Add dishwashing soap if the grout is greasy.
- Apply your homemade cleaning paste on the grout, making sure to follow the grout line. Let it sit for 15 minutes to allow the paste to penetrate deep into the grout’s pores.
- After 15 minutes, scrub intently to let loose all that deep-seated dirt and grime.
- Rinse with hot water and soap, and dry with a sponge or rag.
RELATED ARTICLES

Modern AI-driven hearing aids treat speech and noise as two separate audio streams.

Most Knoxville homeowners shopping for a tankless water heater pick the wrong size.

A 2023 study by the National Association of Realtors found 30% of homebuyers would not buy a house with old plumbing. Yet, only 12% of sellers focus on plumbing upgrades.

According to The Water Heater Warehouse (a special

As a homeowner, you know how important a reliable water heater is. Water heating takes up about 18% of your monthly bills.

Locking up your home is an important step to making sure that no one is able to get into your property when you are not there.